

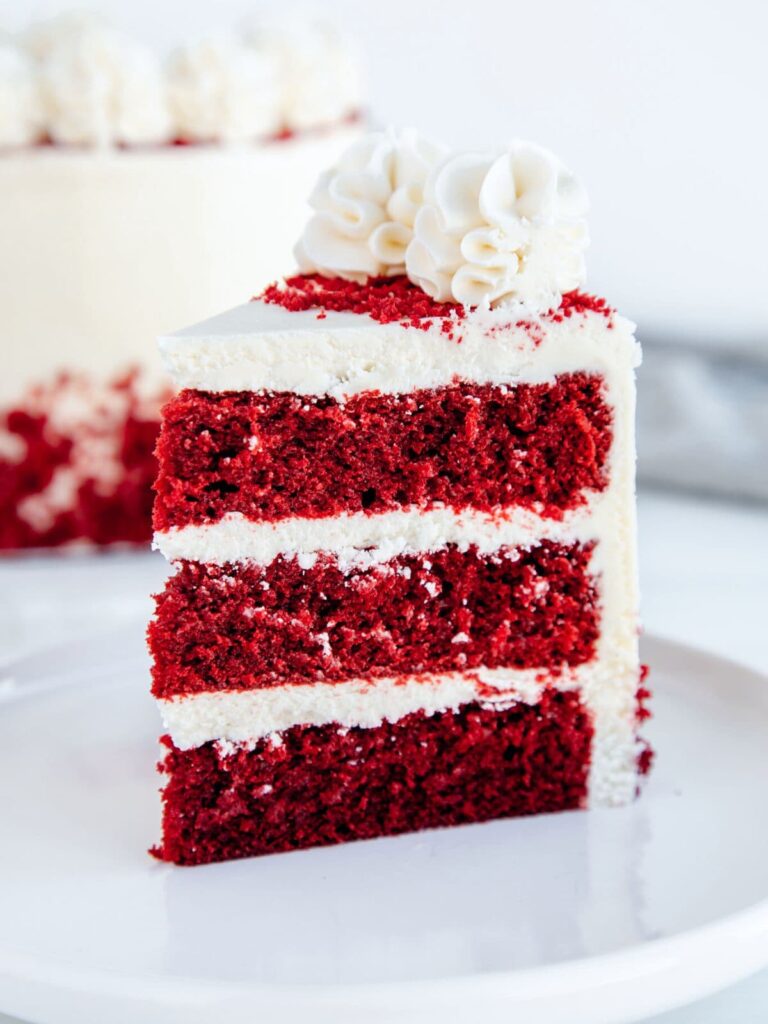
Red Velvet Cake
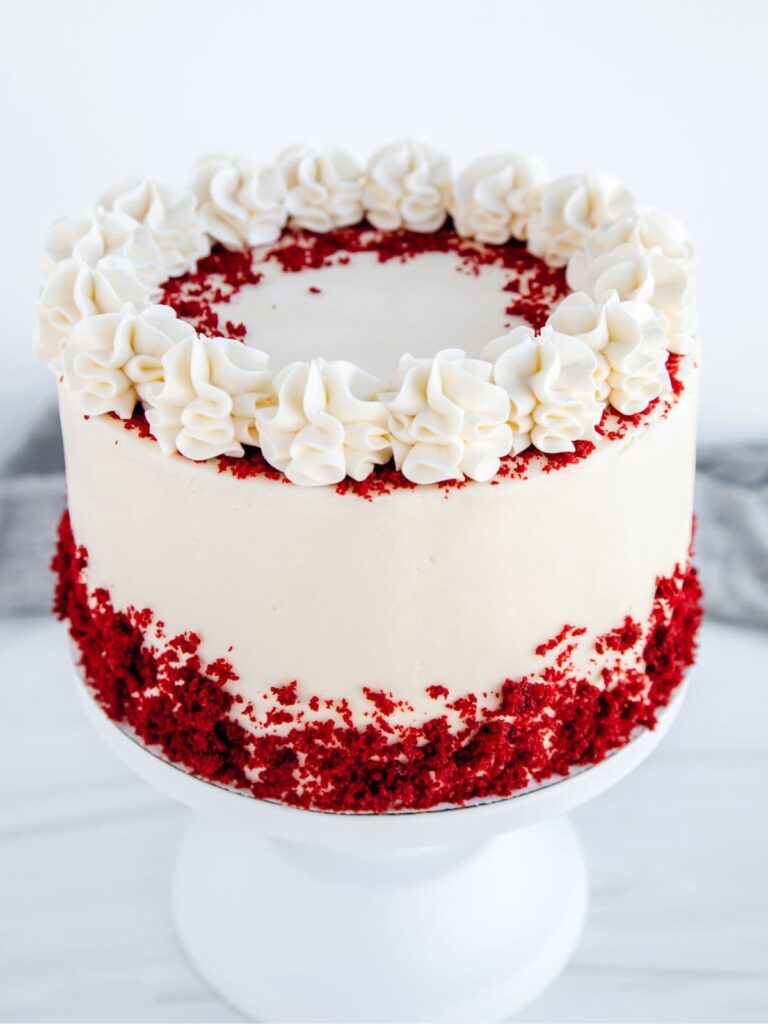
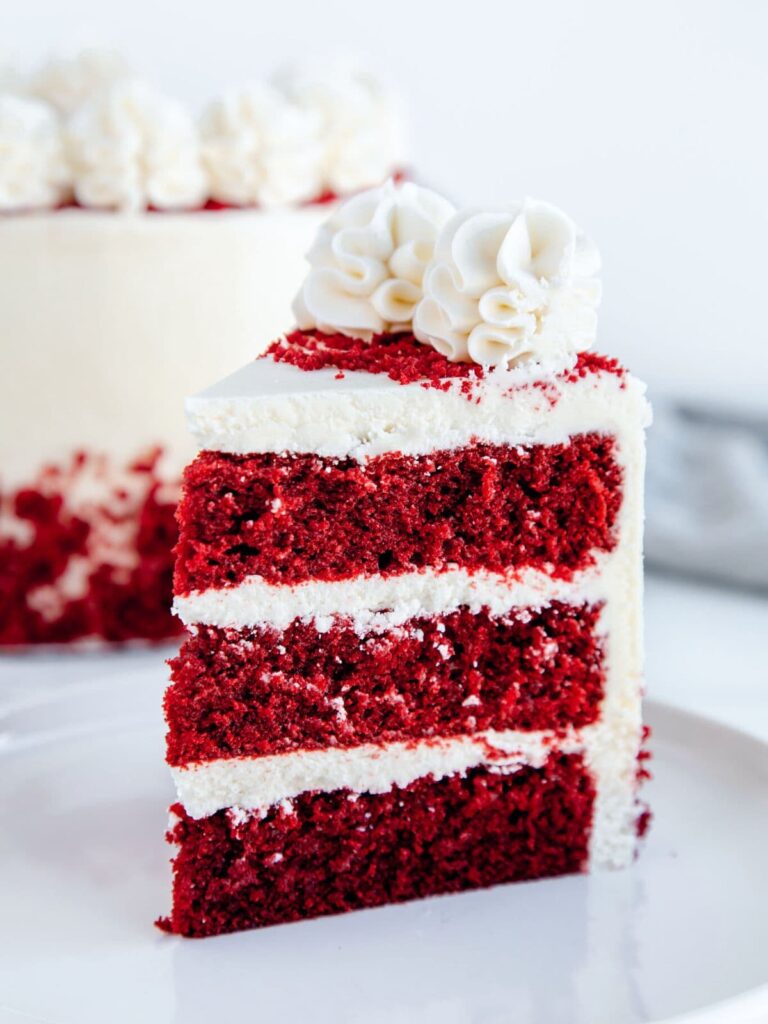
Red velvet cake is a vibrant red cake, flavored with buttermilk and cocoa powder. Frosted with sweet and tangy cream cheese frosting, this classic favorite is cake perfection. This is the best red velvet cake recipe that is easy to make and hard to resist!
Ingredients for Red Velvet Cake
Red velvet cake
- All-purpose flour
- Granulated sugar
- Baking soda: Interacts with the buttermilk and white vinegar to help the cake layers rise.
- Cocoa powder: Use regular natural cocoa powder as opposed to dark cocoa powder to have bright red layers.
- Salt: A flavor enhancer.
- Vegetable oil: You can use any neutral baking oil, including canola oil.
- Eggs: Room temperature.
- Buttermilk: Room temperature.
- Vanilla extract: Vanilla extract gives the cake great flavor.
- White vinegar: Trust me, you won’t taste it. It helps activate the baking soda and is a classic ingredient in red velvet cake.
- Red gel food coloring: Go with red gel food coloring for the brightest red color. I don’t recommend using liquid red food coloring because you will need a TON to get vibrant red color.
Cream cheese frosting
- Unsalted butter: Room temperature.
- Cream cheese: Room temperature.
- Powdered sugar: Also known as confectioners’ sugar or icing sugar.
- Vanilla extract: Vanilla extract gives the frosting great flavor.
- Salt: To contrast the sweetness of the frosting.
Tools & Supplies for Making Red Velvet Cake
How to Make Red Velvet Cake
To make the red velvet cake, you can use a mixing bowl and whisk or an electric hand mixer if you prefer.
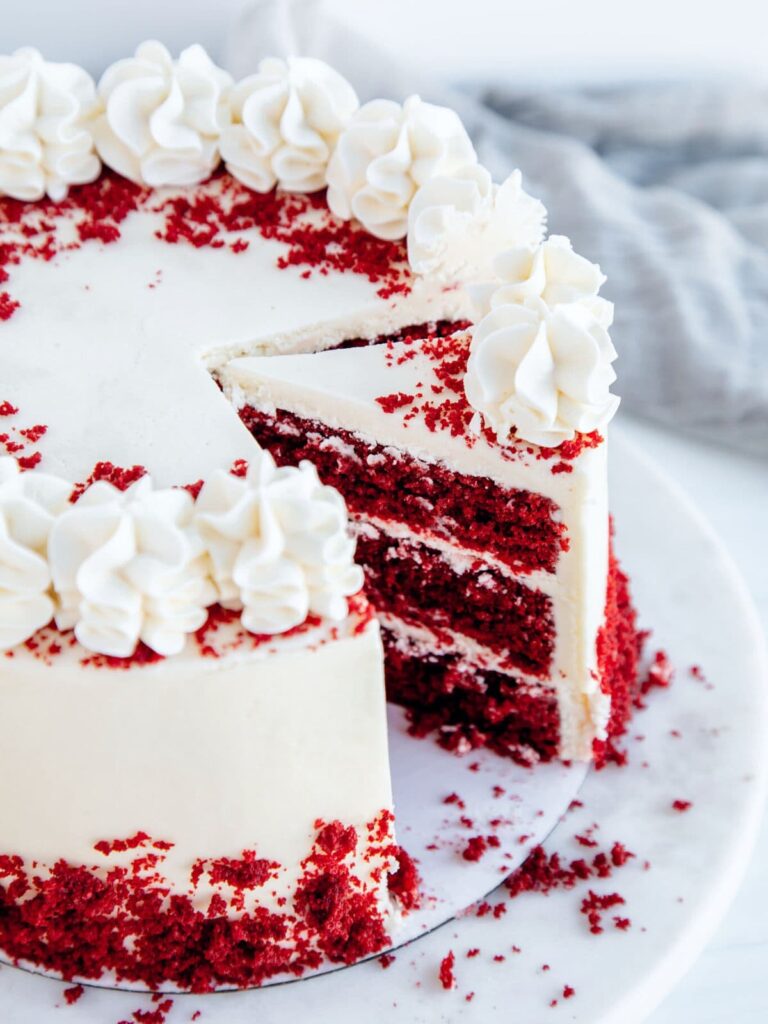
- Preheat oven to 350 degrees F and prepare three 7-inch cake pans with nonstick cooking spray and parchment paper circles.
- In a large bowl, whisk together the dry ingredients (all-purpose flour, granulated sugar, baking soda, cocoa powder, and salt).
- Add the wet ingredients to the flour mixture (vegetable oil, eggs, buttermilk, vanilla extract, white vinegar, and red gel food coloring).
- Mix the batter until all the ingredients are well combined.
- Pour the batter into the prepared pans. Use a kitchen scale to create even layers.
- Bake in a 350 degree oven for approximately 30 minutes until the layers spring back when gently touched.
- Cool the cakes in the cake pans for about 20 minutes and then transfer to a wire rack to cool completely.
How to Make Cream Cheese Frosting
To make the cream cheese frosting, I recommend using a stand mixer fitted with a whisk or paddle attachment (your preference) or an electric hand mixer.
- Whip the butter and cream cheese on medium-high speed until light and fluffy.
- Add half of the powdered sugar and mix on low. Then add the remaining half and continue to mix on low speed.
- Add in the vanilla extract and salt and continue to mix. Scrape the sides and bottom of the bowl to ensure everything is well mixed.
- Turn the mixer to medium and whip for 2 to 3 minutes until smooth and creamy.
Red Velvet Cake Recipe Tips
Bake perfect cake layers
Check out my baking tips blog post on 10 Tips for Baking Perfect Cakes for simple tips and tricks to bake the best cake layers.
Buttermilk substitute
If you do not have buttermilk, you can use a buttermilk substitute! Check out my blog post on how to make buttermilk substitute to see how it is done!
Smooth out the cream cheese frosting
If your cream cheese frosting has a lot of air bubbles, then there are two easy ways to smooth your frosting out. First, you can mix your frosting with a spatula by hand for a few minutes until smooth. My preferred method is to mix the frosting on the lowest speed on a stand mixer with a paddle attachment for about 3-5 minutes.
Assembling the red velvet cake
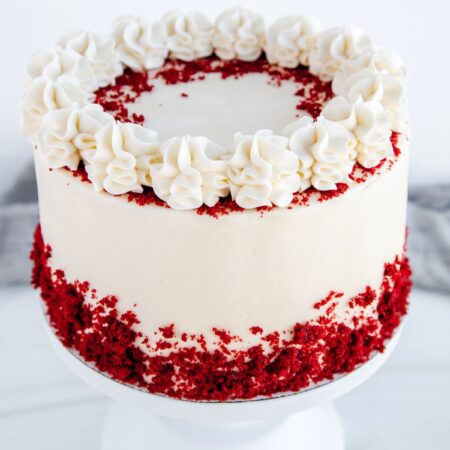
Check out my baking tutorial blog post on how to frost a layer cake to learn the basic steps involved to assemble this red velvet cake. For the cake pictured, I used a Wilton 1M piping tip to create the swirls of cream cheese frosting on the top of the cake.
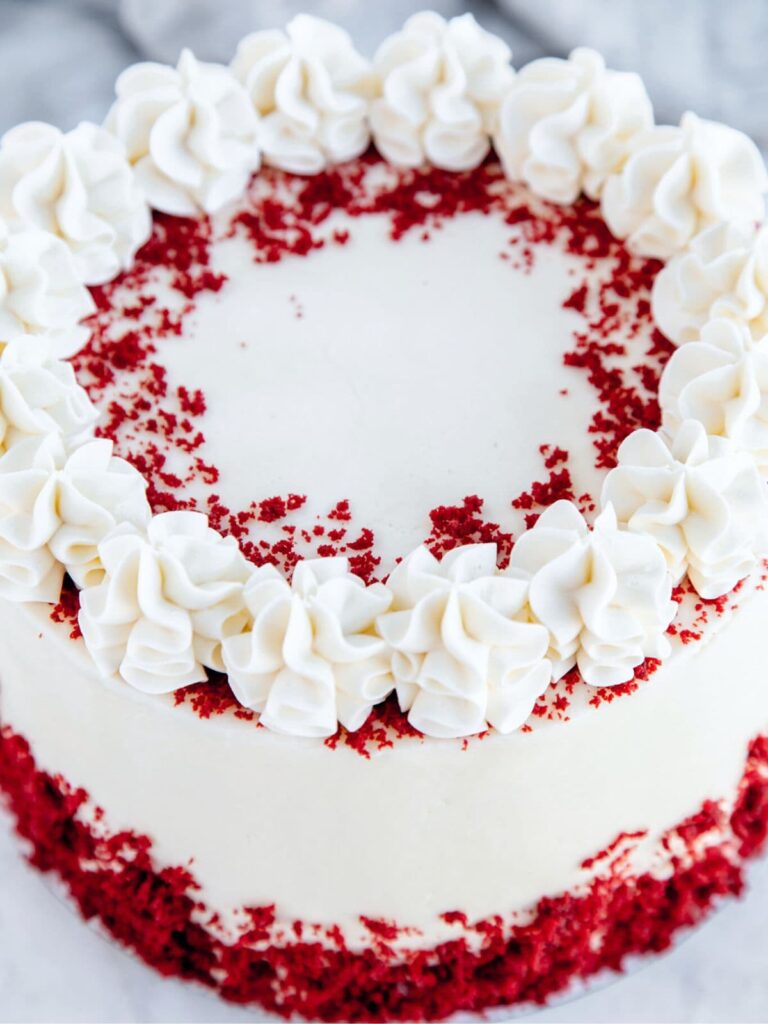
Decorate with red velvet cake crumbs
A fun way to decorate the cake is to sprinkle crumbs on the top and sides. After the cake is leveled, crumble the excess cake from the “cake domes” to create crumbs. After you frost the cake, sprinkle crumbs on the top or sides of the cake. A note of caution: The cake crumbs will dry out in the refrigerator, so I suggest using this method only if you plan on serving the cake the same day.
Storing and serving
Red velvet cake can be stored in an airtight container in the refrigerator for up to five days. Cover any exposed cake with plastic wrap to prevent the cake from drying out. To serve, bring the cake to room temperature for the best taste and texture.
Frequently Asked Questions
Can I use a different size cake pan?
Yes, you can! Please note that baking times will vary depending on the size of the cake pans. For this recipe, you could use four 6-inch pans or two 8-inch or 9-inch cake pans. My favorite way to check and see if the cake layers are done baking is to gently touch the top of the cake. If it springs back, the cake is done baking. If it sinks in, it needs more time in the oven.
Can I use red liquid food coloring?
I do not recommend using liquid food coloring for this recipe. To get the bright red color, you would need a ton of liquid coloring which can impact the taste and texture of the cake. Red gel food coloring is the way to go!
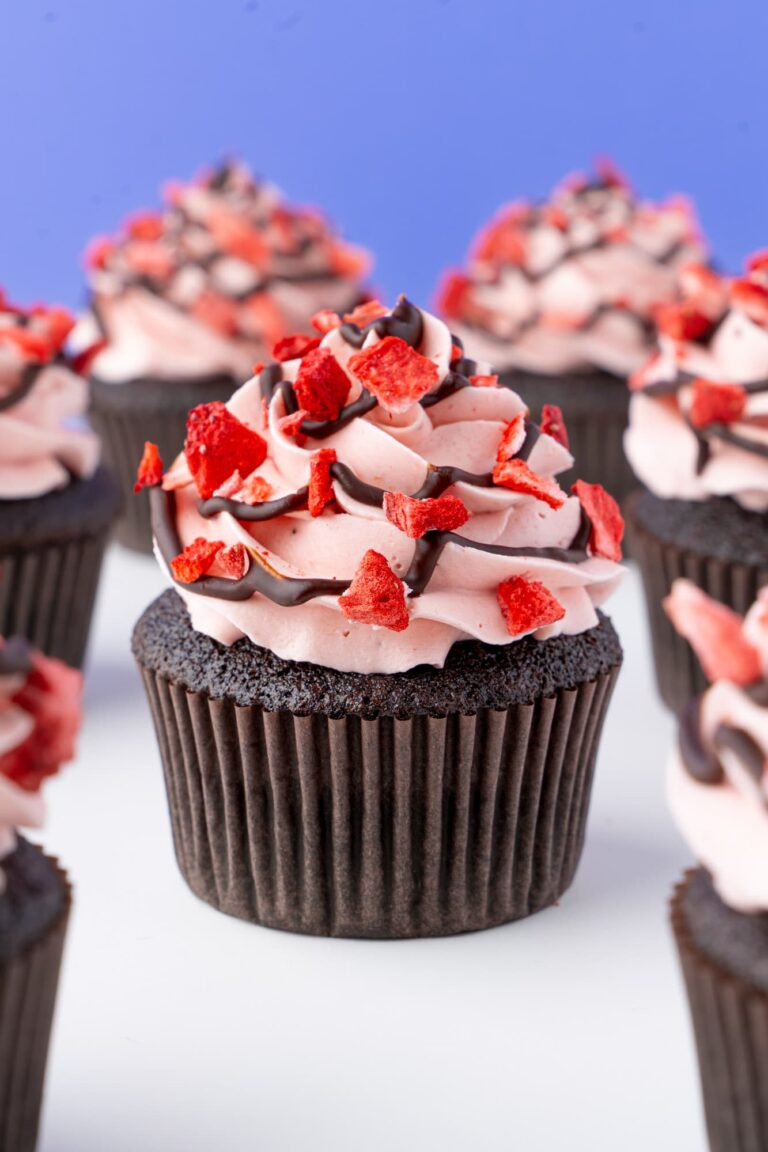
Does this recipe make red velvet cupcakes?
I do not recommend using this recipe to make red velvet cupcakes. Cake recipes are often formulated different than cupcake recipes. Check out my recipe for red velvet cupcakes with cream cheese frosting!
Click here to see a quick video on how to make red velvet cake! Follow Cake Me Home Tonight on TikTok, Instagram, and YouTube for more recipe videos and baking tutorials!
 click the stars to rate!
Red Velvet Cake
Ingredients
Red Velvet Cake
- 2 ½ cups (313 g) all purpose flour
- 1 ½ cups (300 g) granulated sugar
- 1 ¼ tsp (5 g) baking soda
- 2 tbsp (10 g) cocoa powder regular, not dark cocoa powder
- 1 tsp (6 g) salt
- 1 ½ cups (327 g) vegetable oil or other neutral cooking oil
- 2 (2 ) eggs room temperature
- 1 cup (240 g) buttermilk room temperature
- 2 tsp (8 g) vanilla extract
- 1 tsp (5 g) white vinegar
- 1 tbsp (15 g) red gel food coloring
Cream Cheese Frosting
- 2 cups (454 g) unsalted butter room temperature
- 8 oz (227 g) cream cheese room temperature
- 7 cups (840 g) powdered sugar
- 1 tbsp (13 g) vanilla extract
- ½ tsp (3 g) salt adjust to taste
Instructions
Red Velvet Cake
- Preheat oven to 350° F. Prepare three 7-inch cake pans with nonstick cooking spray and parchment circles.
- In a large mixing bowl, whisk together the dry ingredients: all-purpose flour, granulated sugar, baking soda, cocoa powder, and salt.
- Add the wet ingredients (vegetable oil, eggs, buttermilk, vanilla extract, white vinegar, and red gel food coloring) to the dry ingredients. Whisk the wet and dry ingredients together until the batter is combined and smooth.
- Portion the cake batter evenly between the cake pans. Use a kitchen scale to ensure that the batter is equally divided.
- Bake cakes for approximately 30 minutes until the cake layers spring back when gently touched. *Please note that baking times will vary if you use different sizes of cake pans.
- Remove cake pans from the oven and allow the cake layers to cool in the pan for about 15-20 minutes. Remove the cake layers and transfer to a wire rack to cool to room temperature.
Cream Cheese Frosting
- In a mixing bowl with an electric mixer or the bowl of a stand mixer fitted with a paddle or whisk attachment, add room temperature butter and cream cheese. Whip on medium-high speed for 2 minutes, scraping the sides of the bowl occasionally.
- Add half of the powdered sugar and mix on low to combine. Add the second half of the powdered sugar and continue to mix until fully incorporated.
- Add in vanilla extract and salt.
- Turn the mixer on medium speed and whip for 2 to 3 minutes, scraping the sides of the bowl occasionally, until the frosting is smooth and creamy.
Assembling the Red Velvet Cake
- Level the cake layers using a serrated knife.
- Place one cake layer on a cake board or plate. Add desired amount of frosting to the top of the layer and spread evenly.
- Continue to repeat this process until the layers are stacked.
- Spread a very thin layer of frosting all over the cake (crumb coat). Chill the cake for 20-30 minutes.
- Add the final layer of frosting with an offset spatula. Use a cake scraper to remove excess frosting and to smooth the sides and top of the cake.
- If desired, add cake crumbs to the sides or top from the cake domes that were cut off when leveling your layers. Pipe a border of frosting around the top edge of the cake using a Wilton 1M piping tip.
Notes
Made This Recipe?
Please leave a comment with a star rating to let me know how you enjoyed the recipe!

About Courtney
Baker | 80s Lover | Cookbook Author
Courtney is a self-taught home baker and cookbook author of “Girls Just Wanna Bake Cupcakes”. She loves to create new and unique recipes while simultaneously listening to 80s music.


Hi Courtney, would this icing be stable and stiff enough to cover with fondant? Or a layerof ganache and fondant on all over?
Hi Simone! I have never tested fondant with this cream cheese frosting. I know that due to the acidity of cream cheese frosting, it is often not recommended for fondant cakes. I know a lot of bakers will do cream cheese frosting as filling and then a buttercream frosting to cover the cake before fondant.
Hiya,
If I wanted to make this into a tall 8inch x 3 layer cake, would i just need to double the recipe?
Hi Allisha! It depends on how many pans you are using. If you are doing three 8×3 pans, doubling might be too much. You might need 1.5 the recipe. My general rule is to fill cake pans no more than halfway full. If there is any extra cake batter, I typically make cupcakes!
Hi, I was just wondering what kind of oven you are using. Is it fan-forced? Thank you.
Hi Marielle! I have the Kitchenaid 30-Inch 5-Burner Gas Slide-In Convection Range. I don’t use the convection setting for my baking.
Hi! I’ve made this cake a couple of times and the outer part gets really hard. Is it something I’m doing wrong?
Other than that it’s really delicious!
Hi Maria! What kind of cake pans are you using? Sometimes the type of pan can make a difference. Also, are you baking the cake layers in the center of the oven?
Im going to make this For my husband’s bday , he’s partial to cupcakes and I’ll be feeding a lot of people.. can this recipe be used for cupcakes?
Hi Joy! I would actually recommend trying out my red velvet cupcake recipe which is a formulation specifically for cupcakes! https://cakemehometonight.com/red-velvet-cupcakes/
Made this last night for valentines, sooo yummy!!! Cake was moist and tasty! Have it bookmarked!
Hi Jenn! So glad you loved the recipe! It is one of my favorites and perfect for Valentine’s Day! Thanks so much for trying the recipe and leaving a positive review!
This cake looks so good. I want to make it for my daughter inlaw. For the red gel food coloring. Is there a number on the gel bottle that you used? There is different shades of red. . I just want to get the right shade of red, you have.
Hi Susie! My go-to for gel food coloring is Americolor and the color I use is called “super red” and has “420” on the package!
Will this recipe work for a Bundt cake? Baking time?
Hi Cindi! I actually haven’t tested this cake recipe as a bundt, so I can’t say for certain if it would work out well or how long the bake time would be. I don’t want to give you incorrect information and lead to a red velvet cake disaster for you! If you give it a try, please let me know how it worked out!
I have made your recipe and it was a hit and so moist but some part of the cake became bitter. Help! I wanted to make it again and I dont know what went wrong. The only thing I remember is that the cake was out of fridge for about 4 hours before eating it.
Hi Alex! What comes to mind is perhaps the red food coloring you are using is causing the cake to become bitter?
Hi courtney,
Do I need to sift the flour and cocoa before mixing the dry ingredients? Thank you.
Hi there! You don’t have to, unless it is very lumpy.
I want to try this so bad! I just ruined everything I try to make them waste my money lol I’ve heard of one stick of butter with 8 ounces of cream cheese, but this is four sticks of butter? 1 pound of butter? Only one 8 ounce block of cream cheese?
Hi Deborah! The cream cheese frosting in this recipe is more of a cream cheese buttercream. You still get the great taste of cream cheese frosting with a touch more stability. If you have a preferred cream cheese frosting recipe, definitely go for it!
Will this cream cheese frosting recipe be enough for crumb coating, layering, frosting, and adding a top border to the cake?
Hello! Yes, it should! I typically have some frosting leftover even after I do all that, but it truly depends on how much you use to fill, frost, and decorate.
Hi courtney, I’m planning to make a wedding cake with this recipe of yours. Just wondering if I could use a 10 inch round pan with this recipe or if I double the recipe, will or work? Thank you!
Hi Marielle! Yes! That should work! You might need to do a double recipe in 2 10-inch round pans.
Thank you so much, courtney! Baking time for the 10 inch cake please? But I will try to make it with an 8 inches first. One more thing, do we need to sift the powdered sugar before we mix it with the frosting ingredients? Thank you!
This is an educated estimate, but I would say probably between 35-40 minutes. For the powdered sugar, I typically do not sift it unless it is very lumpy!
Can I use 3 8 inch pans?
Hi Ron! Yes you can! The layers may be a bit thinner, but that will work just fine!
Hi, can I make this with two 8 inch cake tins?
Hi Ash! The batter might yield a bit too much for 2 8-inch pans. I would recommend filling the pans a little over half full and then using any excess batter to make a few cupcakes.
Necesito esta receta en gramos por favor 🙏
Of course! If you go to the recipe card and click “metric”, it will give you the recipe in grams.
De verdad que este pastel de terciopelo rojo es increíblemente sabroso, tiene un sabor increíble, muy húmedo y agradable al paladar pero quería preguntarte si está masa de pastel de terciopelo rojo sirve para hacer tartas de altura, cómo por ejemplo una altura de 20 o 30 cms de altura, resistiría, o se hundiría la tarta, esa es mi inquietud porque por lo demás es una tarta sabrosísima cubierta con un frosting también delicioso
Hi Nivea! So happy to hear you enjoyed the recipe. I can’t accurately answer your question as I have never tried to use this recipe to bake a cake that is 20 to 30 cm high, so I’m not sure if it would sink or not rise. I have only baked this recipe in 5 cm tall pans. If you try it out, please let me know how it comes out!
Muchísimas gracias por tu respuesta intentaré hacerlo para ver cómo me va
Beautiful! How long would you bake for with x3 of 8” pans, rather then the 7”?
Hello Amanda! I would start checking out the layers around 25 minutes or so. If you gently touch the top of the cake and it bounces back, it’s ready to go.
This was the BEST red velvet cake I have ever had! I’ve alsways been afraid to make one. Not sure why. But this was my first time making it and it was delicious! Approved by my red velvet cake obsessed daughter!
Oh wow! I am so thrilled to hear that! Red velvet cake is one of my personal favorites and I just love how easy this recipe is! Thank you for the positive review! 🙂
Courtney has made this cake for me a few times and it’s by far my favorite!!! This recipe is so delicious. I can eat an entire cake in one sitting. I would absolutely recommend this cake for any occasion.
I’m so glad you love this cake! Can’t go wrong with red velvet! xo
I did this for my daughter in law birthday it was very yummy that taste of creamy sour added with cream cheese made the cake amazingly tasty all the guests enjoyed it was lovely thank you for the recipe
I am so glad you enjoyed the recipe! Thank you so much for trying it out and leaving a positive review! I truly appreciate it!
I made this red velvet cake for my daughters 20th Birthday and she loved it and so did our guests. I didn’t use the cream cheese frosting but instead I used the Vanilla American Buttercream, it was amazing! THANK YOU for sharing all your wonderful recipes.
Love it! Thank you so much for trying out the recipe! I am glad that everyone enjoyed it! And happy birthday to your daughter! Thanks for leaving a review! 🙂
Loved the cream cheese frosting!
I’m so glad you enjoyed it! Cream cheese frosting is the best!
Made this cake for my Dad’s birthday and it was a hit! Very moist and delicious. Very easy to follow the recipe and especially helpful to see the tools needed for the cake. I was a little skeptical of the vinegar but you couldn’t even taste it! Would definitely make this again!
Thank you for trying the recipe! I’m so glad you enjoyed it! The vinegar does seem strange but it works perfectly!