

No Bake Mint Chocolate Cheesecake
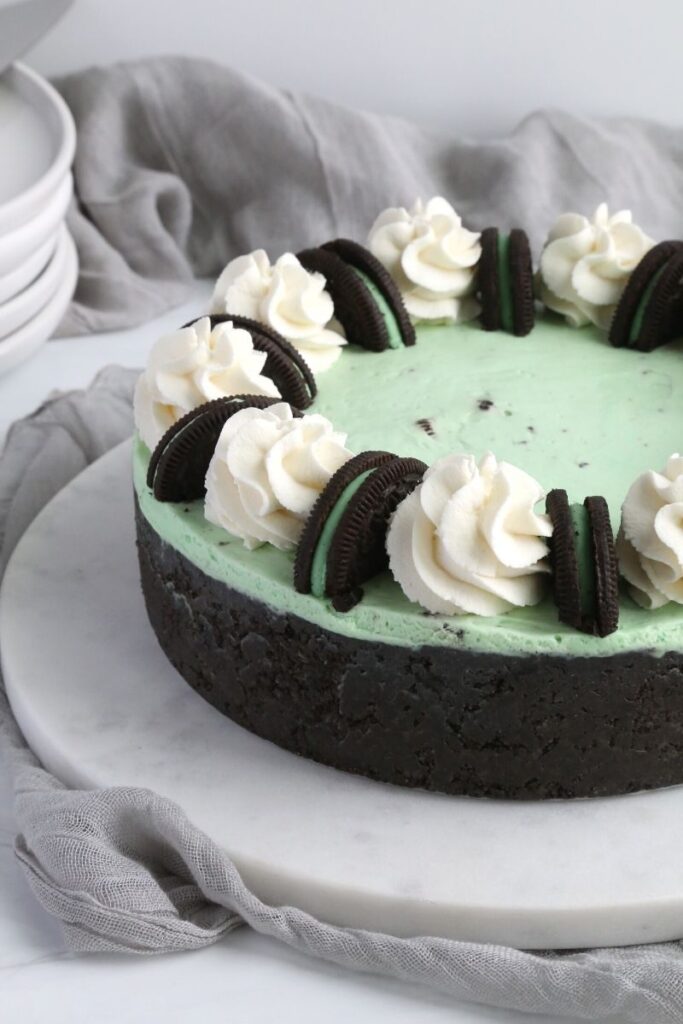
No bake mint chocolate cheesecake is an easy dessert if you don’t feel like turning on the oven! This no bake cheesecake is made with chocolate cookie crumbs, mint cookie cheesecake filling, whipped cream, and mint Oreo cookies! A slice of this cheesecake tastes just like mint chocolate ice cream.

Ingredients for No Bake Mint Chocolate Cheesecake
Chocolate cookie rust
- Chocolate sandwich cookies: I love using Mint Oreo Cookies for extra mint flavor. You can also use regular Oreo cookies or your favorite chocolate sandwich cookie. Keep some extras for decorating the cheesecake. Use a food processor to make small crumbs.
- Granulated sugar
- Salt
- Unsalted butter: Melted. You can use salted butter, just omit additional salt.
Mint cookie cheesecake filling
- Cream cheese: Full fat cream cheese softened to room temperature for easy creaming.
- Granulated sugar: For sweetness.
- Mint extract: Use regular mint extract as opposed to peppermint extract. Mint extract has a spearmint flavor.
- Vanilla extract: Pure vanilla extract adds a slight underlying vanilla flavor.
- Heavy cream: Heavy cream or heavy whipping cream will work equally as well.
- Powdered sugar: Whipped with the heavy cream, powdered sugar adds a bit more sweetness and gives the cheesecake filling great texture.
- Green gel food coloring: Optional but recommended. A little bit of food coloring gives the cheesecake a cool, minty appearance.
- Mint chocolate sandwich cookies: To add a bit of texture to the filling, roughly chopped Mint Oreo Cookies or chocolate sandwich cookies are added to the filling.
Whipped cream
- Heavy cream: Cold heavy cream or heavy whipping cream.
- Powdered sugar: To add a touch of sweetness.
- Vanilla extract: Pure vanilla extract adds a subtle vanilla flavor.
Tools & Supplies for Making No Bake Mint Chocolate Cheesecake
How to Make No Bake Mint Chocolate Cheesecake
Chocolate cookie crust
- Combine the mint chocolate sandwich cookie crumbs, granulated sugar, salt, and melted butter.
- Pour the crumbs into a cheesecake pan or springform pan lined with a parchment circle.
- Spread the crumbs around the bottom and up the sides of the pan.
- Use a flat-bottomed measuring cup or the bottom of a flat glass to firmly press the crumbs up the sides and along the bottom of the pan.
- Chill the crust in the refrigerator for 30 minutes while you make the cheesecake filling.

No bake mint cookies and cream cheesecake filling
To make the cheesecake filling, I recommend using an electric hand mixer to a stand mixer fitted with a whisk attachment.
- In a large bowl, cream together cream cheese, granulated sugar, mint extract, and vanilla extract. Add a drop or two of green food coloring to achieve your desired color.
- In a separate medium bowl, whip heavy cream and powdered sugar until stiff peaks form.
- Add the whipped cream to the cream cheese mixture and mix on the lowest speed until well-combined. Do not over mix.
- Fold in chopped mint chocolate sandwich cookies.
- Pour the cheesecake filling into the chilled crust and spread using a small offset spatula.
- Chill the cheesecake for 6 hours or overnight.

Whipped cream
To make the whipped cream, I recommend using an electric hand mixer to a stand mixer fitted with a whisk attachment.
- Combine heavy cream, powdered sugar, and vanilla extract. Whip on medium-high speed until stiff peaks form.
- Spread or pipe the whipped cream onto the cheesecake. Garnish with additional mint chocolate sandwich cookies.

No Bake Mint Chocolate Cheesecake Recipe Tips
Chocolate cookie crumbs
I love using a small food processer to make the mint chocolate cookie crumbs. The finer the grind, the better. No need to remove the cream filling!
Preparing the cheesecake/springform pan
I love using a parchment circle at the bottom of the pan for easy removal of the cheesecake from the pan. A cheesecake pan or a springform pan are a must for easy cheesecake removal. I recommend using an 8-inch or 9-inch pan for the amounts in this recipe.
Firmly press the cookie crumbs to create the crust
Because we are not baking the crust, the cookie crumbs should be firmly packed so they form a solid crust. Start off by gently pressing the crumbs into the pan using a flat-bottomed measuring cup or drinking glass and then gradually press more firmly.
Do not over mix the filling
When combining the mint cream cheese mixture with the whipped cream, you do not want to overmix the filling. Mix on the lowest speed until it is well combined and there are no streaks. Then, gently fold in the chopped chocolate sandwich cookies.
Chilling the cheesecake
Chill the cheesecake for at least 6 hours or overnight. Cover with plastic wrap to avoid the cheesecake from absorbing any odors that are present in your fridge. You can keep the cheesecake in the pan for several days before serving.
Storing and serving
The cheesecake can be stored in an airtight container in the refrigerator for up to 5 days. I recommend making and frosting the cheesecake with whipped cream the day you are going to serve the cheesecake. If you make it too far in advanced, the whipped cream may wilt. If you want to make it ahead of time, I recommend checking out my recipe for Stabilized Whipped Cream Frosting. Cut the amounts to 1/4 of the original recipe.

Click here to see a quick video on how to make no bake mint chocolate cheesecake! Follow Cake Me Home Tonight on TikTok, Instagram, and YouTube for more recipe videos and baking tutorials!

 click the stars to rate!
No Bake Mint Chocolate Cheesecake
Equipment
- 8-inch cheesecake pan or springform pan
- Electric hand mixer or stand mixer fitted with a whisk attachment
Ingredients
Chocolate Cookie Crust
- 3 cups (300 g) mint chocolate sandwich cookie crumbs
- 2 tbsp (2 tbsp) granulated sugar
- ¼ tsp (0.25 tsp) salt
- ½ cup (113 g) unsalted butter melted
Mint Cookie Cheesecake Filling
- 16 oz (16 oz.) cream cheese room temperature
- ⅓ cup (66 g) granulated sugar
- 2 tsp (2 tsp) mint extract
- 1 tsp (1 tsp) vanilla extract
- 1-2 drops (1 drop) green gel food coloring optional
- 1 cup (238 g) heavy cream
- ¾ cup (90 g) powdered sugar
- ½ cup (80 g) mint chocolate sandwich cookies chopped
Vanilla Whipped Cream
- 1 cup (238 g) heavy cream
- 2 tbsp (2 tbsp) powdered sugar
- 1 tsp (1 tsp) vanilla extract
Instructions
Mint Chocolate Cookie Crust
- In a bowl, combine mint chocolate sandwich cookie crumbs, granulated sugar, salt, and melted butter. Stir to combine.
- Pour cookie crumbs into a cheesecake pan or springform pan lined with a parchment paper circle on the bottom.
- Using a flat-bottomed measuring cup or drinking glass, gently press the cookie crumbs along the bottom and up the sides of the pan. Once the crumbs are evenly distributed, press the crumbs more firmly so the crust holds together.
- Chill the crust for 30 minutes until firm. While the crust is chilling, make the cheesecake filling.
No Bake Mint Cookie Cheesecake Filling
- In a mixing bowl with an electric hand mixer or the bowl of a stand mixer fitted with a whisk attachment, cream together softened cream cheese, granulated sugar, mint extract, vanilla extract and a drop of green gel food coloring (optional).
- Mix on medium speed until the mixture is smooth. Scrape the sides and bottom of the bowl to ensure everything is well mixed.
- In a separate bowl, combine heavy cream and powdered sugar. With an electric hand mixer, whip the heavy cream until stiff peaks form.
- Add the whipped cream to the cream cheese mixture. Mix on low speed until well combined and smooth. Do not over mix.
- Use a mixing spatula to fold in chopped mint chocolate cookies until well dispersed throughout the filling.
- Pour the cheesecake filling into the chilled chocolate cookie crust and spread evenly using an offset spatula.
- Wrap in plastic wrap and chill for at least 6 hours or overnight.
Vanilla Whipped Cream
- In a mixing bowl with an electric hand mixer or bowl of a stand mixer fitted with a whisk attachment, combine heavy cream, powdered sugar, and vanilla extract.
- Whip the heavy cream on medium-high speed until stiff peaks form. The whipped cream should hold its shape but still be soft and smooth.
- Top the chilled cheesecake with the whipped cream. Spread with an offset spatula and/or pipe on using your favorite piping tip! Add additional mint chocolate sandwich cookies for garnish if desired.
Notes
Made This Recipe?
Please leave a comment with a star rating to let me know how you enjoyed the recipe!

About Courtney
Baker | 80s Lover | Cookbook Author
Courtney is a self-taught home baker and cookbook author of “Girls Just Wanna Bake Cupcakes”. She loves to create new and unique recipes while simultaneously listening to 80s music.


Never Miss A Sweet Recipe!
Subscribe get the latest recipes, baking tips and more sent straight to your inbox!
Did you make this recipe or want to see more? Make sure to leave your review below and tag me on Instagram @CakeMeHomeTonight so I can see your creations!